Monday, March 30, 2015

Hello!

Hi there! Sorry, it's been a while. It's been a long week and the weekend always goes by too fast especially when hubs works all day Saturday and we are booked with plans Sundays. The past week has been crazy spent shopping, getting ready for Easter, then L had the flu and that was a huge, HUGE mess this weekend! So I know I have been MIA for quite a while now and it's probably because I am too busy to upload pics and then write a blog or because I have had so many projects going on around the house to tidy up, make our house a "home" and feel more cozy all while watching a little toddler destroy the clean house in the process. Here are some of the things we've been working on...

I started working on a project that we have been wanting to do for so long now... our old ottoman needed a facelift. I bought some awesome fabric that I got a great deal on and I taught myself how to do it the right way thanks to YouTube and Pinterest! I decided that I would do the ottoman two separate patterns and use the excess fabric for pillows! No sew pillows at that. I sure as heck am becoming a great home maker, aren't I?

Here's the Blog - DIY OTTOMAN & PILLOWS (No Sewing Required)

After that was done, I decided to move onto our basement! We need to give it a huge facelift and make it more a family room, playroom, entertaining space. Our basement was like any other; dark, dingy, old, cold, and creepy especially in the dark! So L and I made a trip to Home Depot and grabbed some bright, fun colored paint, called my brother and painted away!

BEFORE:
(don't even look at that mess of a storage room we have... it will get better!)


*This room we haven't touched yet. I need help with some ideas that are inexpensive but will still make this room more efficient. Playroom/Family room/Entertaining area? HELP, we are so lost on whether or not to finish the room, leave it unfinished, etc. Look at those hideous 3x painted over concrete floors... HORRIBLE.


AFTER:

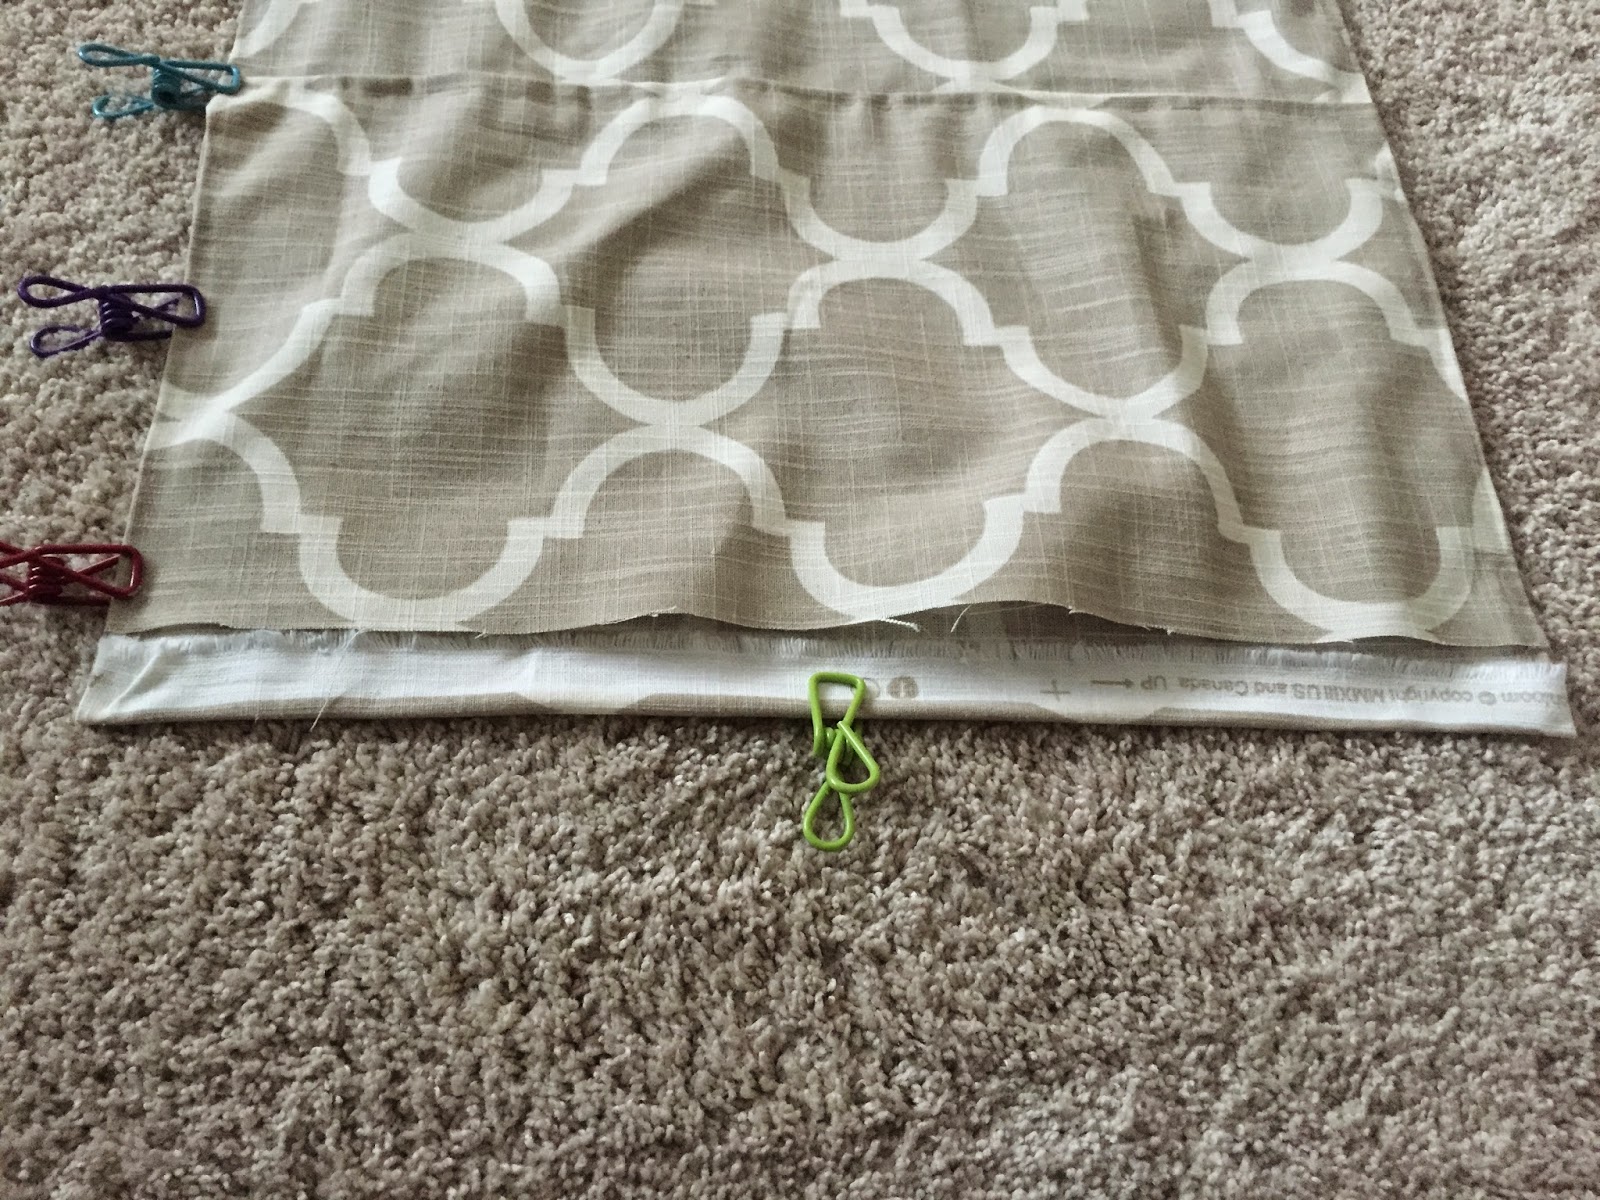
 Aren't these the cutest little window covers ever? DIY from an old pillow case! Grab some liquid stitch, some chip clips and you're good to go! VOILA!


(Ok, so maybe that messy storage area doesn't get better... It's a mess still! Oh well!)


*And after I did all of this hubby changed out all the lightbulbs down there for LED lights so it's nice and bright! 
YAY!

Oh, and I was getting tired of waiting for my dad to have a day off work to come help me hang my new basement door so I did it myself. Again, all thanks to the Diynetwork website and youtube! 


I also needed a facelift on my master bedroom! New painted wall, as of a few months ago, new paintings I did myself and new comforter and sheets! Bright yellow and grey... So warm and cozy!


A little added decor to the kitchen.. :) Thanks Pinterest for the idea, I doodled, painted the inside and grabbed an old frame. Free and easy!


Then there's the front porch that's in need of some warmer weather so we can plant flowers into that awesome built in planters box. For now, we will decorate with a chalkboard barn window and my handmade WELCOME sign!


And of course Lennon picked out light up eggs at Target last week. In my opinion, they're the tackiest  
things in the world. If you know me, you know I HATE themed decorations that aren't handmade and cutesy. These are tacky, bright and terrible. Thankfully, Easter is this weekend and we can take them down ;) But I did redo my mantle, took all the pic frames off for now and just have a couple of things going on up there. I still need a large new mirror instead of the last name picture frame but we are working on it!


Okay, so crafting set aside for a while...

Great news, L decided randomly one night that she didn't want to wear pull ups anymore. I have been attempting potty training on and off since November of last year and it hasn't been working. We were in pull ups 24/7 which was a huge expense but I just didn't want to go back to diapers and have her think she wasn't a "big girl" anymore. I was so shocked that she came up to me and asked for undies, we put them on and since Thursday night a few weeks ago & NO ACCIDENTS. Fingers crossed & knock on wood it stays this way. I am SO SO SO proud of her right now! I can't believe my little toddler is in undies and they're so cute on her little butt. :)

Also, we are going up north this week for some R&R and family time. It's much needed after being cooped up in the house the past couple of weeks! I can't wait!

After we return we are planning a weekend hotel trip to the waterpark with Lennon again. We took her to the waterpark a couple weeks ago and she had a BLAST! We couldn't get her off the water slides to even eat dinner. When we did, she threw a temper tantrum, so we ate dinner at the restaurant there and headed home. It was so fun we are planing a whole weekend there soon!

Well, that's all for now. Until next time...

XO, K.


DIY Ottoman & Pillows [No-Sewing Required!]

DIY REUPHOLSTERED OTTOMAN 

(NO SEWING REQUIRED! WOOT - WOOT!)


So, here's where we began... A terribly made ottoman that came with our sectional. Seriously, what kind of furniture company takes pride in the fact that their ottoman is made from CARDBOARD on top to support what, magazines? ...  I mean seriously, it supported nothing, not even our feet. The entire top caved in whenever something was put on it. So, after months of it sitting around in the basement I decided to do it over myself. 

I bought:
34"x34" sheet of 1/2" plywood (Home Depot rocks at cutting things for you!)
Fabric - I used this one from JoAnn Fabrics  for the top when I had a 50% off coupon!
Liquid Stitch from Michaels
Needles & Thread
Pillows 
Buttons 

You'll also need scissors, tape measure, staple gun, drill and screws.


Well, here's where we began. This is the top once I took off the fabric, batting and crap cardboard on top. I left this as is, I added the plywood later as it was used as the top! 


Once all my fabric was off and staples were pulled out I made the top of the ottoman first.
I drilled holes (you can see them if you look close) for the tufting (that I never ended up doing!)


I'm not sure why I didn't get a photo of the process of this... OOPS!
But, here's a photo of the top batting, foam and it sitting on top of the frame of the ottoman base. 
I literally laid the batting on top of this plywood, stretched my fabric and then used a staple gun. So easy! 


It turned out better than I could have imagined. So proud of myself! :)


So, I set that aside and made the base. 
This was the more irritating part but pretty easy once I got my pattern down!

Again, I used the actual batting from the old ottoman that I was able to save. 
It worked out great! 


Then once all sides were covered and stapled down I had to sew my two pieces of fabric together. I cheated a bit, I used liquid stitch first and then just added stitches to make it look nicer! (It's so not the best sewing job ever but it works and no one can tell once it's all put together)


Once my fabric was sewn and dried good I ironed it to smooth it all out and began laying it on the ottoman, stretching and stapling! I stapled all of it down and then I was done! 

Once the bottom was done I flipped it over with the top of the ottoman plywood side up and used a drill with 2" screws to attach them together.

Here's the underneath once it was done:


These feet were from the original ottoman, I was able to reuse them even though I still want to buy really nice thick wood ones! Eventually!


I may have over-stapled, what do you think? Oh, well!


Small touches to the ottoman, I didn't want to sew anything on my own so I folded the corners over and added stitches by hand to make it look nicer. (It's dirty of course... thanks to the toddler that lives here!) :)


DIY NO-SEW PILLOWS

So, when I had leftover fabric I made pillows... and get this, I didn't sew a damn thing.
Liquid stitch is my new BFF. Who knew this stuff was so amazing and didn't tell me?!
I used liquid stitch and chip clips. Amazing combo, let me tell ya! 

So, first grab your pillow and then measure your fabric to ensure it will fit! I used 2 of these from JoAnn's, they're so soft and perfect size.


(This is the only pillow I had to sew the two pieces in the middle together. I ran out of fabric!)
Again, just like the ottoman, I used liquid stitch to hold together and then ran some stitches with thread by hand to reenforce it and make it look nicer.


I let the glue dry for about 20-30 min. before stuffing the pillow in. It worked great!


That was easy wasn't it?


We've been using the ottoman and pillows for over a month now and no tears, rips at the seams or anything at all! They are holding up great and everyone loves them!

Happy crafting!
XO, K.